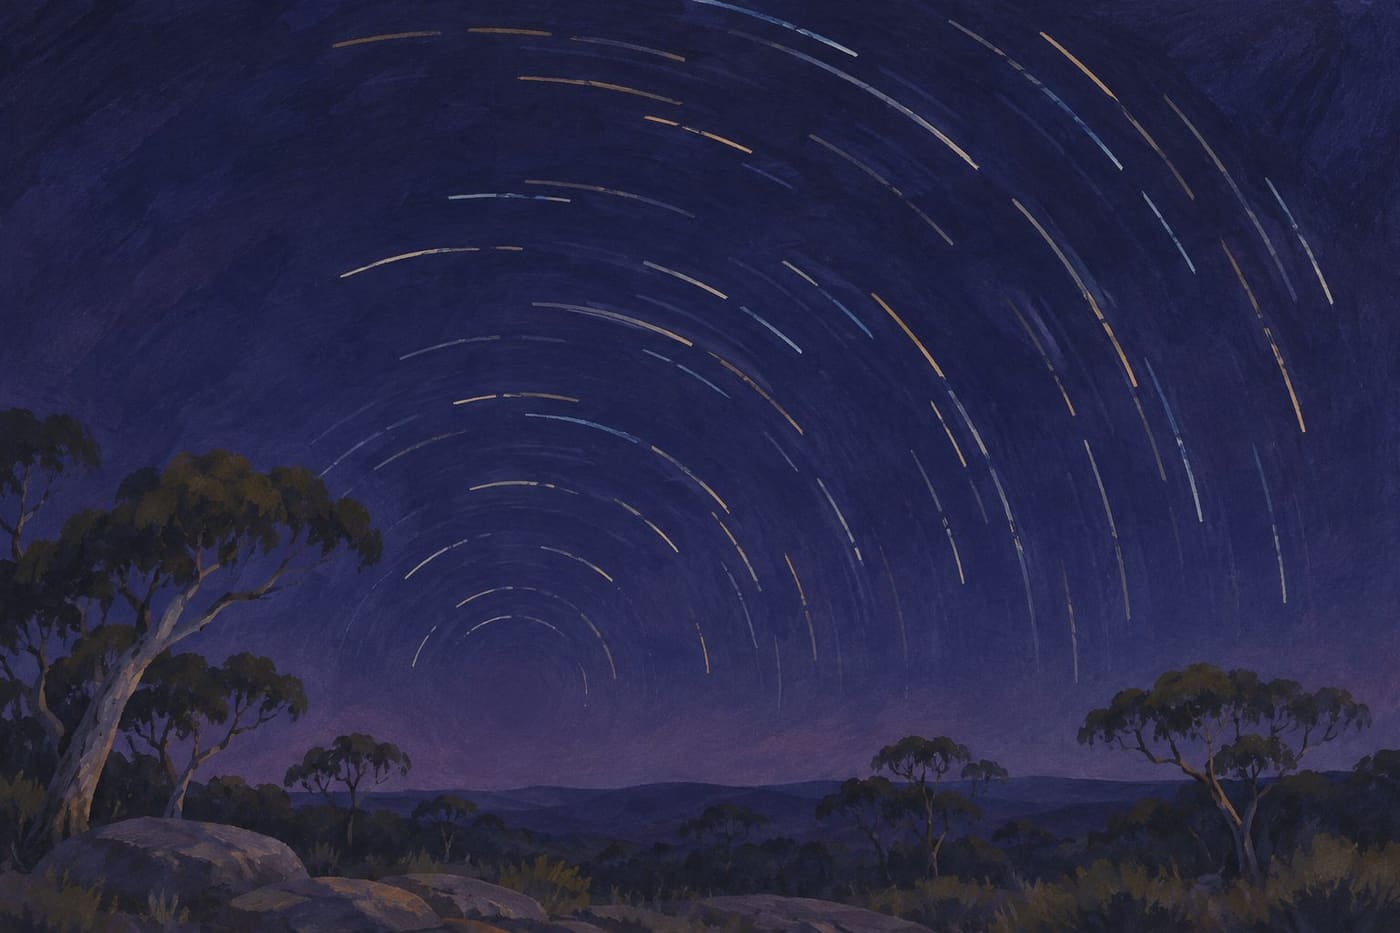
A photograph of curved star trails can look like a record of stars wheeling around a dark hole. Put the camera down and the sky seems nearly still. The two views fit together. The camera has accumulated light over time, turning a slow change of position into a shape that you can inspect. Its arcs give you a way to see the rotation of Earth from the ground.
From Australia, a south-facing frame can include the point around which those trails appear to turn. The point is called the south celestial pole. You can reason about where it will be before going outside, then compare your prediction against the shape of a picture. This is a guide to reading that geometry, with a small observation exercise and a way to separate real sky motion from effects introduced by the camera.
Find the point the arcs share
Imagine extending Earth's rotation axis out through the South Pole and into the sky. The direction of that line marks the south celestial pole. Earth carries the observer and the camera with it as it rotates. Seen from the camera, distant stars gradually shift against the fixed scene on the ground. Over a sufficiently long interval, their positions trace parts of circles around the celestial pole.
The European Southern Observatory’s south-facing La Silla image gives a real example from Chile. Its camera combined a series of exposures, and the observatory locates the pole above a telescope dome on the right. The photograph is especially useful because you can look away from the central point and follow several trails at different distances. They form nested curves. The dome is a foreground reference, and moving to a different camera position would change where the dome sits relative to the sky.
In Australia, do the same visual exercise on a picture of the southern sky. Choose three separated trails. Imagine completing each curve. Their common centre is the direction you are trying to identify. A short segment can look almost straight, so choose trails with enough curvature and compare them across different parts of the image. A broad view can help you see the pattern, though lens projection and cropping affect how it looks on the page.
NASA's explanation of the pole stars points out that the Southern Hemisphere currently lacks a bright star at the pole. A dark patch at the shared centre is therefore unremarkable. The pattern is the clue. You can recognize it without identifying every star that contributed light to the photograph.
Predict the pole’s height before going outside
Start with two limiting places on an ideal spherical Earth. At the South Pole, the extension of the axis points directly overhead. At the equator, that same direction lies on the southern horizon. From a southern latitude between those places, the pole sits between the horizon and the zenith. In the ideal geometry, its altitude in degrees above a level horizon equals the magnitude of the observer's southern latitude.
For a simple Australian comparison, imagine an observer at 20 degrees south and another at 40 degrees south. Both face true south on level ground. The first predicts a pole about 20 degrees above the horizon. The second predicts about 40 degrees. A camera set to the same angle at both places will therefore put the centre of the trails in different positions in the frame. The numbers are worked examples, and the location and angle should be measured separately if you want to test them.
A tree line, hill or roof can block part of the sky, but its edge does not reset the angle. Imagine a ridge extending 12 degrees above the level horizon at the first site. The pole will be about eight degrees above that ridge along the same vertical direction. A taller ridge could hide the pole even though some arcs remain visible farther out. Drawing a quick horizon sketch helps you distinguish an obstruction from an error in the prediction.
True south here means the direction toward Earth's geographic South Pole. For a rough sky exercise, write down how you chose that direction and how accurately you think you can point. If you use a map, check where your chosen horizon feature sits relative to the observing position. If you use a compass, note whether the reading is magnetic or corrected to true direction. You can then compare the result with the sky without treating the first estimate as exact.
Separate the angle turned from the length of the trail
Imagine two beads on a turntable. One sits close to the middle and the other near the rim. When the turntable moves through a quarter turn, both beads turn through the same angle around the centre. The outer bead covers more distance. The same distinction helps with star trails. Over the same interval, stars at different distances from the pole turn through the same angle around the axis, while stars farther from the pole generally leave longer arcs in the portion of sky around it.
For a rough calculation, divide 360 degrees by approximately 24 hours. The result is about 15 degrees of rotation per hour. If the first exposure begins at 9:10 p.m. and the last one ends at 9:50 p.m., the total span is 40 minutes. That is two thirds of an hour, so the expected sweep around the pole is about 10 degrees. This is the angle between the directions from the shared centre to the start and end of the trail, in the sky's geometry. It is neither the total length in the image nor an exact timing method. The sidereal rotation period is slightly shorter than a 24-hour solar day.
You can try the distinction on paper. Draw two circles of different sizes with the same centre. Mark two rays with a protractor about ten degrees apart. Highlight the sections between those lines. The highlighted marks have different lengths even though the angle is the same. In a real image, stars near the pole may make tiny marks that are harder to distinguish from blur. Near the outer edges of a wide-angle image, distortion can complicate direct measurement. Compare several trails before interpreting a single one.
Work with a short sequence and keep the frames
An observation can start with two ordinary pictures from a stable camera position and a fixed frame. Choose a safe, permitted place with a useful view to the south. It helps to include a foreground edge you can recognise in each image. Write down the direction, the start time and the time zone, and make a note of clouds or bright light. Check the first image for distinct stars and a sharp foreground. If you change the framing later, start a new sequence with a fresh note.
Now wait for a measurable interval and take another picture from the same position. Pick a small group of stars you can identify in both frames. Compare them against the foreground. A stationary building edge gives you a way to see whether the camera shifted. If that edge moves relative to the frame, correct your setup before claiming that all of the displacement came from the sky.
A longer sequence can show the motion more clearly. Save the individual exposures even if you make a composite later. In a composite, several modest exposures can become a long trail if their star positions are layered. A gap between exposures can leave a break in an arc. Keeping the originals means you can inspect the moment of a break, distinguish a missed exposure from cloud, and show how the result was assembled. Record the time from the first opening to the last closing as well as the total time the camera collected light. Those measurements can differ.
Suppose one sequence uses twelve 20-second exposures with five seconds between consecutive frames. The camera collects light for 240 seconds. Eleven gaps add 55 seconds, giving a span of 295 seconds from the first opening to the last close. At the rough sky rate, the whole span represents a little over one degree around the axis. In a second sequence with the same total light collection and longer gaps, the visible marks may be more widely separated. The two totals answer different questions.
Treat a stray line as evidence to classify
In ESO’s east-facing La Silla sequence, the pole lies outside the picture and the caption identifies a separate aircraft trail near the horizon. Both details are worth looking for in other images. A frame can show stellar arcs without including their centre, and a visible streak can come from something much closer to the camera. Compare its shape and direction with neighboring trails before assigning it to the same pattern.
If a mark crosses several curves, check the individual frames. Is the mark present in a single exposure or does it develop across several? Does it repeat with a change in brightness? Do the stars around it show the same interruption? The answers narrow the possibilities without proving an object's identity from a single image. A faint arc cut by the edge of the frame can also look like an unrelated line. A wider view or a second sequence may resolve the ambiguity.
Atmospheric effects can change the appearance of the stars while Earth continues to turn. A star near the horizon can fluctuate in brightness, and cloud can dim several stars at once. The related explanation Why Stars Twinkle More Near the Horizon describes changes in the incoming light on its path through the atmosphere. In a trail sequence, distinguish those brightness changes from the shared geometry of the stars' positions.
One way to check for a frame-wide change is to compare stars on both sides of the suspected interruption. If several trails fade at the same stage in a sequence, open the corresponding exposures and inspect the rest of the frame. A band of cloud might cross part of the field while leaving a distant patch clear. An individual trail with a gap tells you where to look. The neighboring trails and the original frames help you decide which explanation fits.
Read the frame as a record of a particular observation
Return to the observer at 20 degrees south. Imagine her first picture shows arcs curving around a point outside the upper right edge. That result alone leaves several possibilities. The camera may have been aimed east of true south, the frame may have been too narrow, or the horizon reference may have been misunderstood. For a second sequence she finds the direction from her position to a known foreground feature on a map, chooses a wider frame and writes down the predicted pole location. She changes one part of the setup at a time where practical.
If the second frame includes the centre at a plausible height above the level horizon, her prediction and observation agree within the limits of the setup. If they disagree, she can check the recorded aim, tilt and horizon, then compare more than one arc. If the centre remains outside the image, that can still be a useful outcome. It says where the frame was pointed relative to the pattern, and she can try a different composition on another night.
An observation note can be as short as a few sentences. Record the approximate latitude and direction. Say whether the frame shows the centre or only part of the arcs. Note which foreground feature stayed fixed and how long the sequence spans. Finally, identify which part of the result was measured, which was estimated and which was inferred. With those details, another reader can see the same photograph as a test of an idea, rather than guessing how it was made.
Sources consulted 7 November 2026. ESO's two La Silla image records provide real observing examples, and NASA's pole-star explanation supplies the southern pole context. The observation scenarios and calculations are original worked examples. The article illustration is an artistic depiction of the pattern.